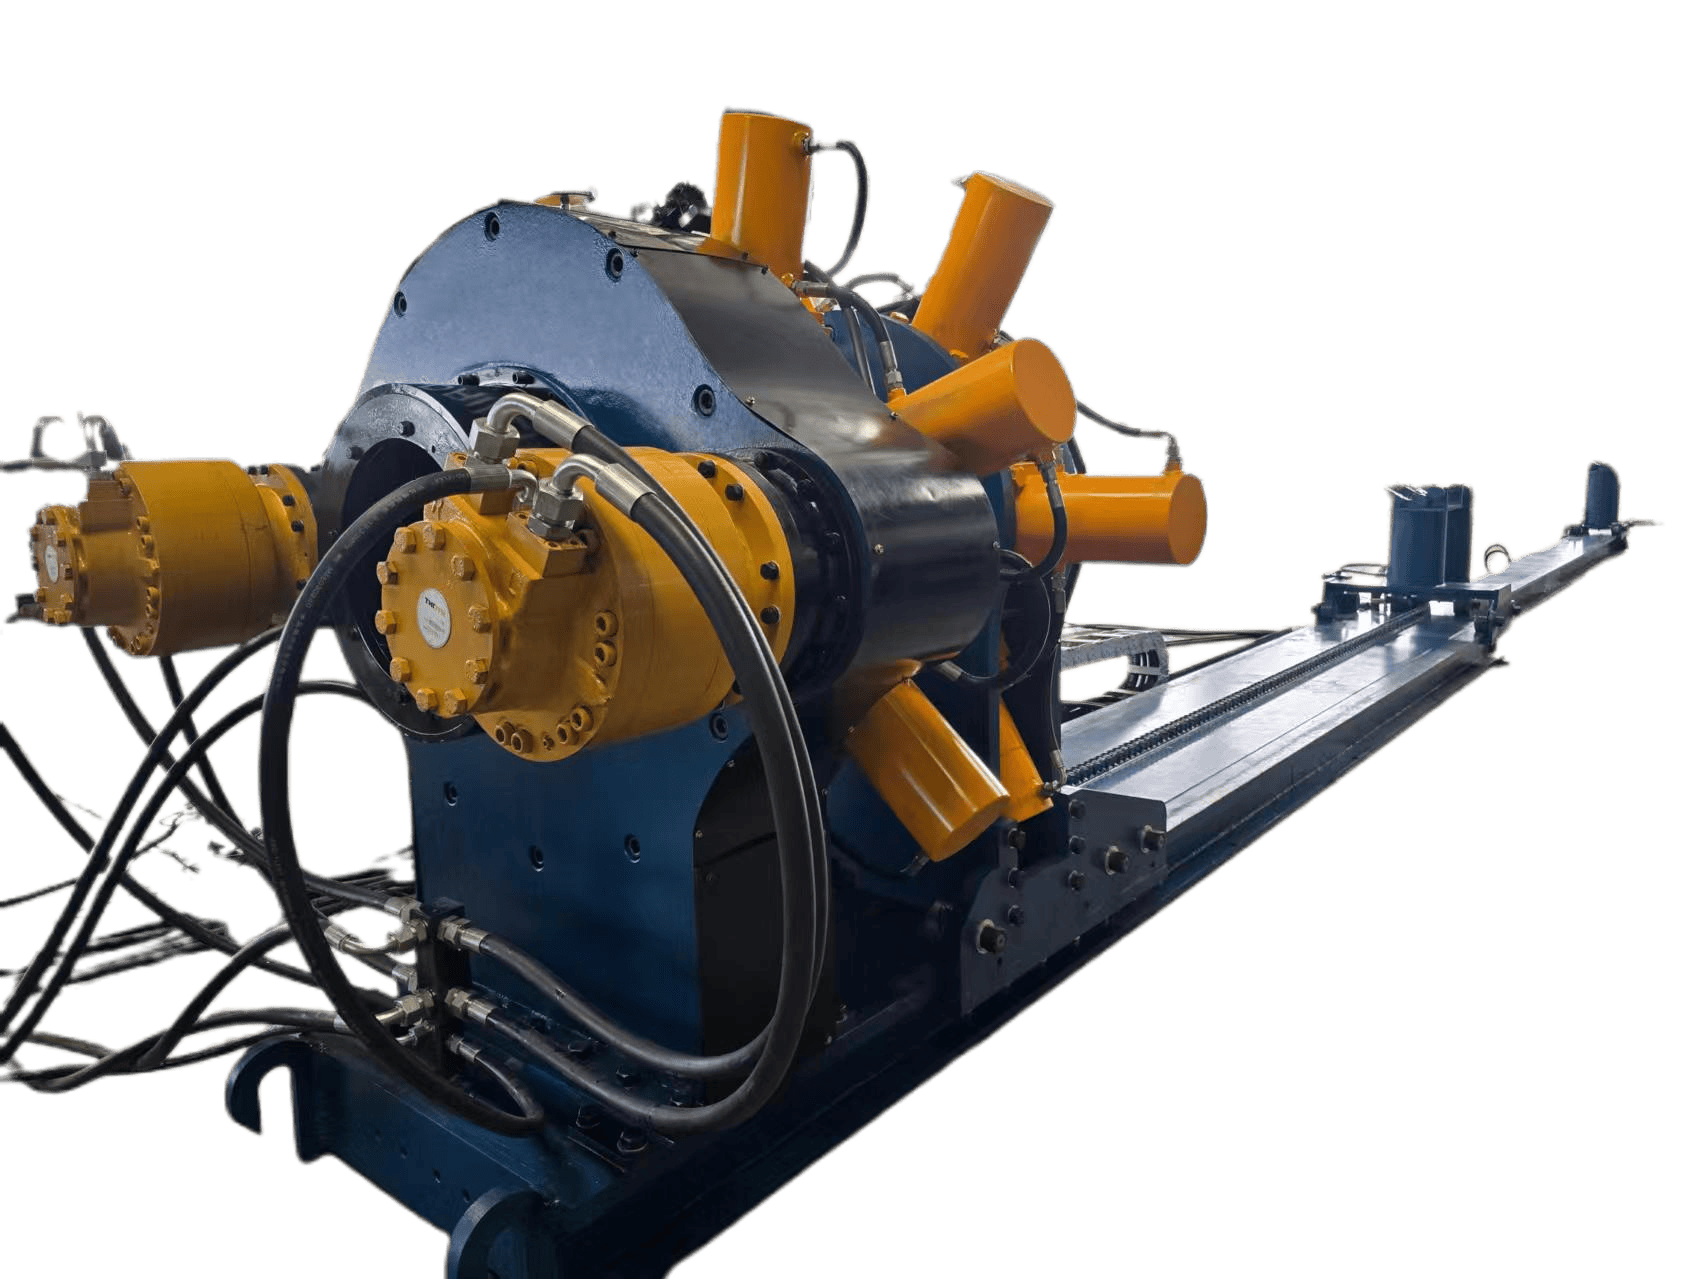
Hydraulic Bucking Unit
Galip’s hydraulic bucking unit, also known as a bucking machine, gives you 360-degree continuous rotation, torque-turn recording, and automatic reporting for premium and API tubular make-up. We build each one to order at our own factory in China and price it to undercut Western-built machines of the same class, and every figure we publish is proven on the machine at the pre-shipment acceptance test before it ships.
Why Connection Quality Matters
Premium connection make-up is not judged by torque value alone. Failures show up downstream — rejected joints, galled threads, leak paths, missed audits — and they almost always trace back to how the make-up was controlled, not what the catalog said the torque should be.
What Galip Controls
Galip's bucking unit is built as a process-control system, not just a torque source. Each variable below is actively managed so the same make-up procedure produces the same result on every joint, every shift, every audit.

Precision Torque Control for Premium Bucking Unit Make-Up
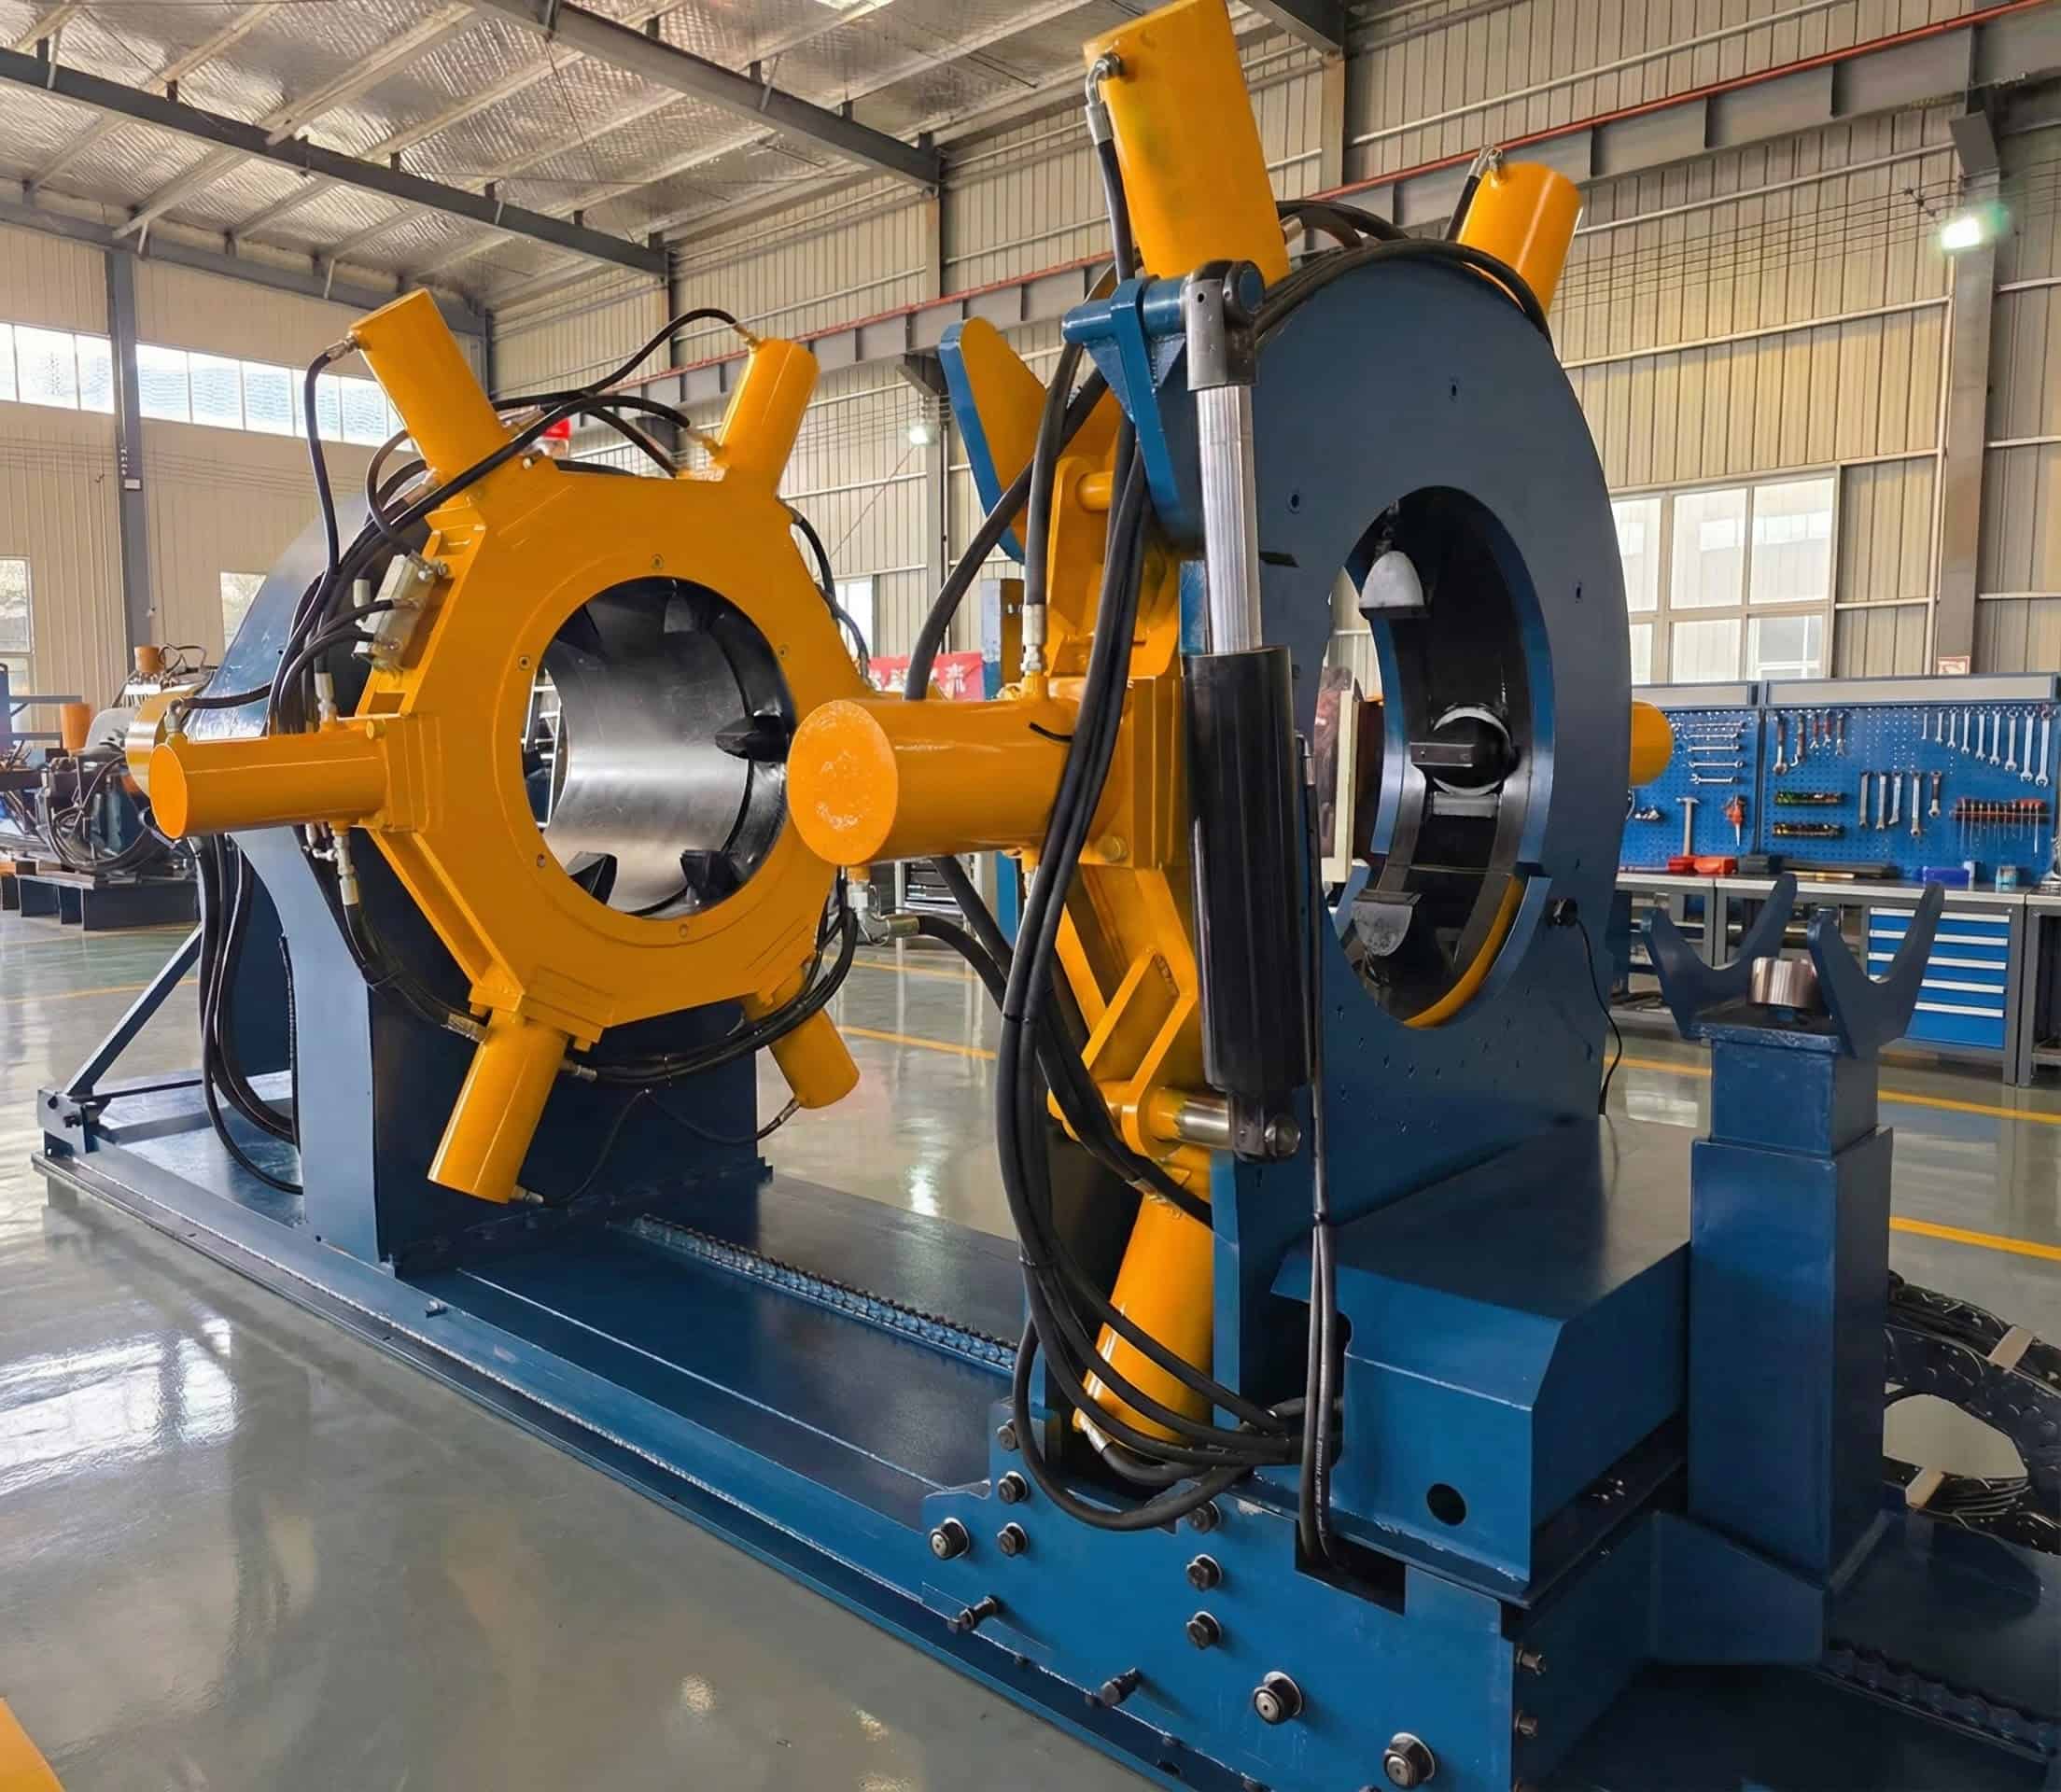
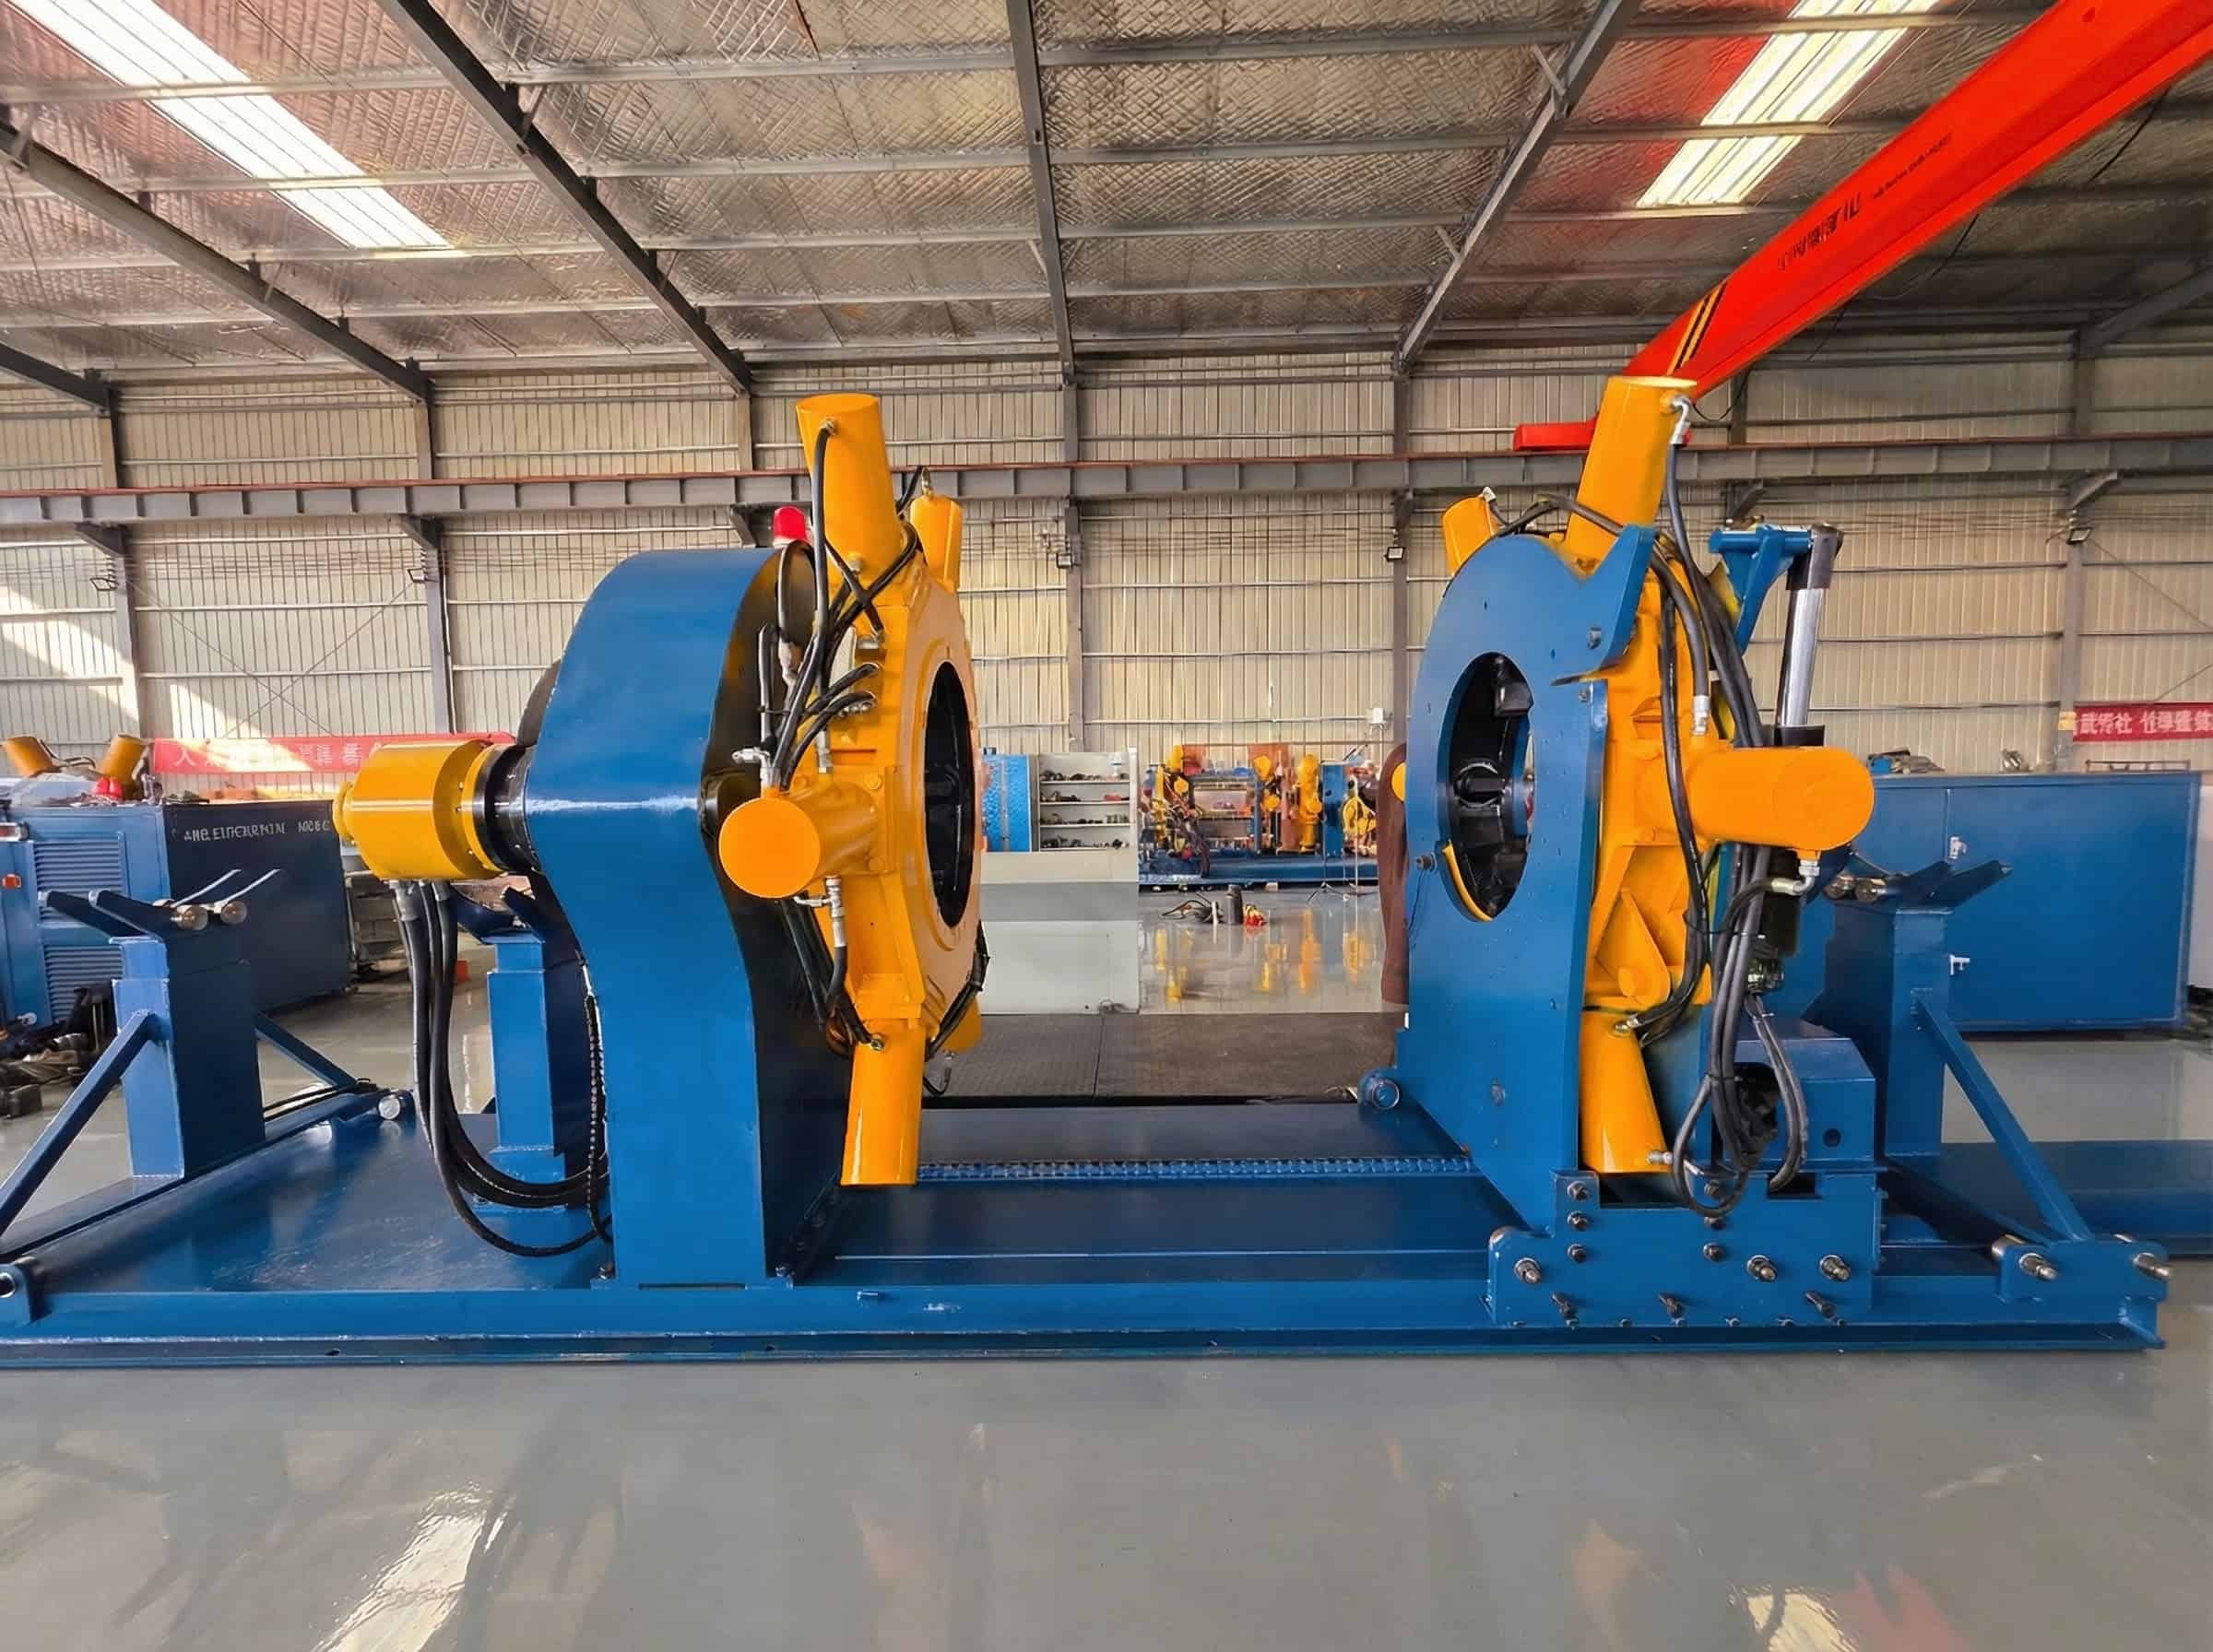
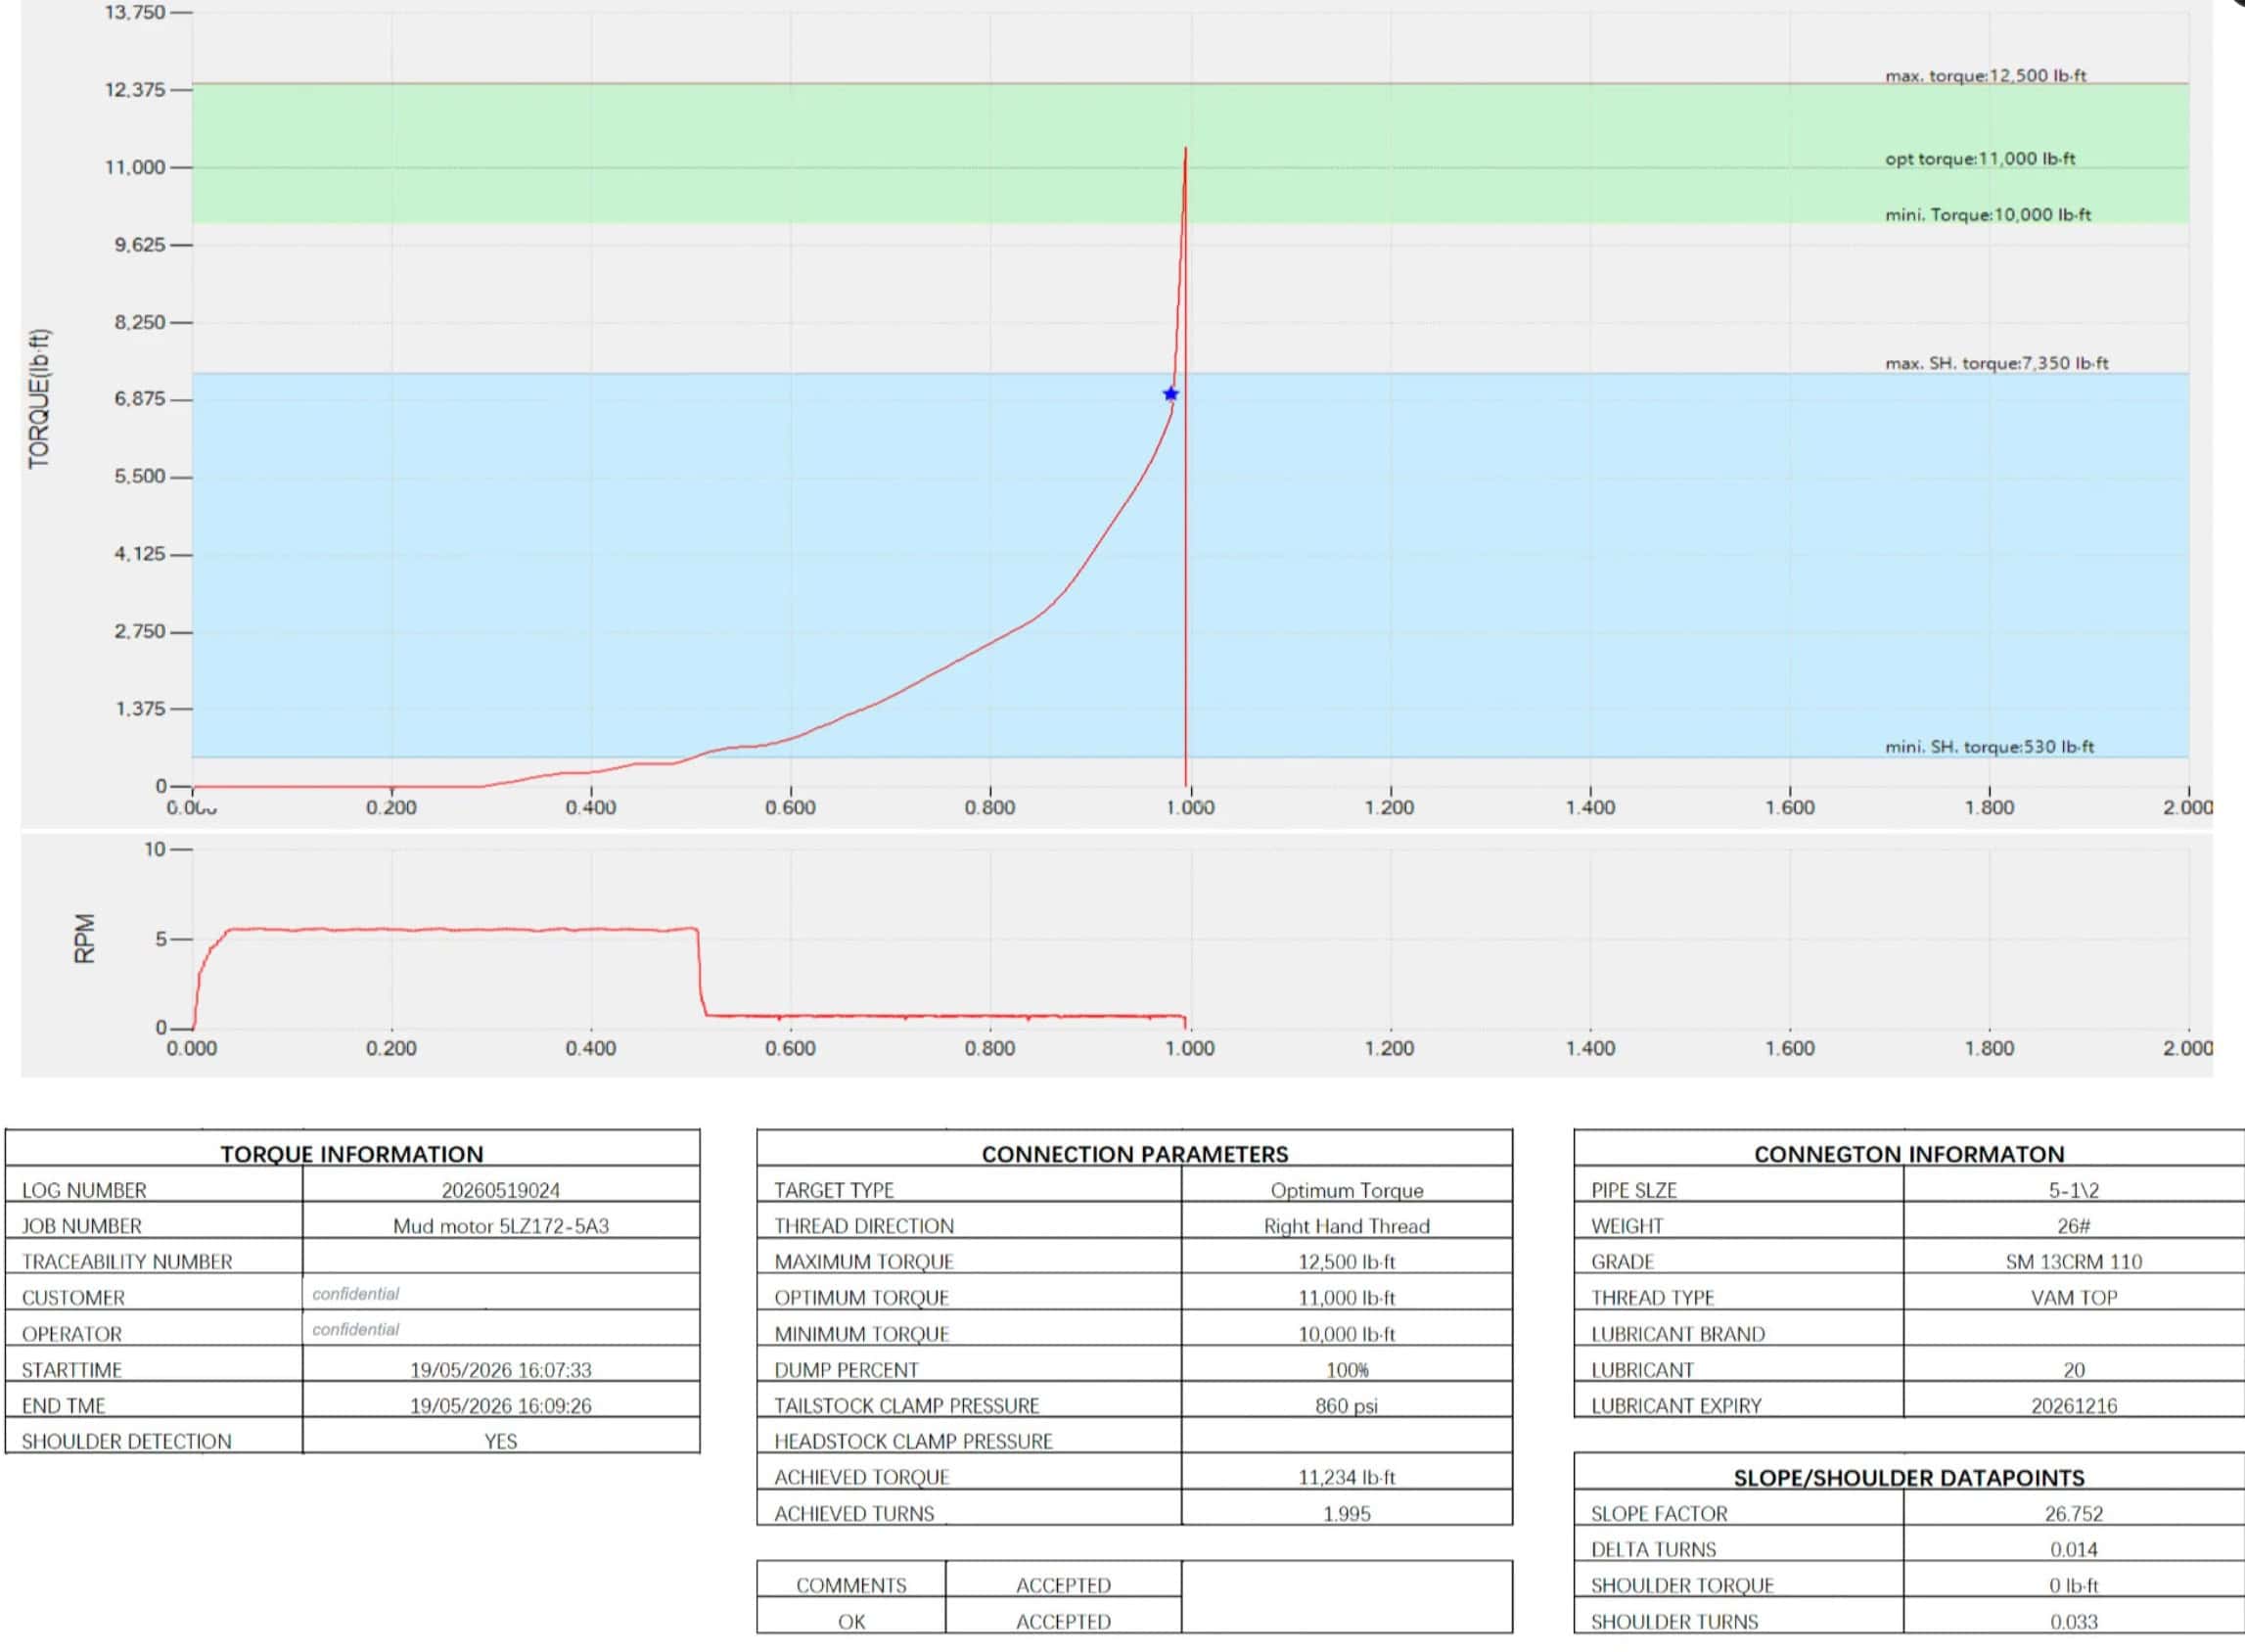
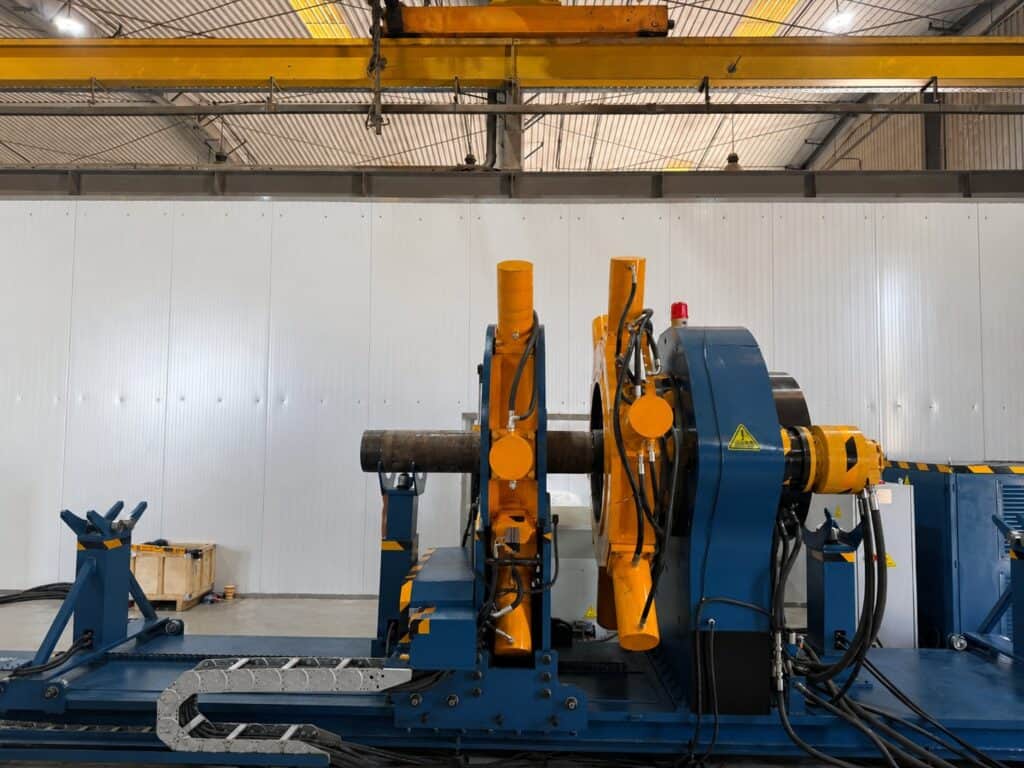
Our units make up and break out threaded connections without damaging the threads or the pipe body — a heavy hydraulic grip, kept under fine digital control. As it runs, the machine finds the shoulder point on the torque-turn curve by itself and checks shoulder and delta torque against your acceptance limits in real time. The record shown here is a real, redacted make-up from a Galip machine: a VAM TOP connection that shouldered cleanly and passed on the first try. When a job needs monitored make-up and a report you can hand to QA, the unit is set up around exactly that.
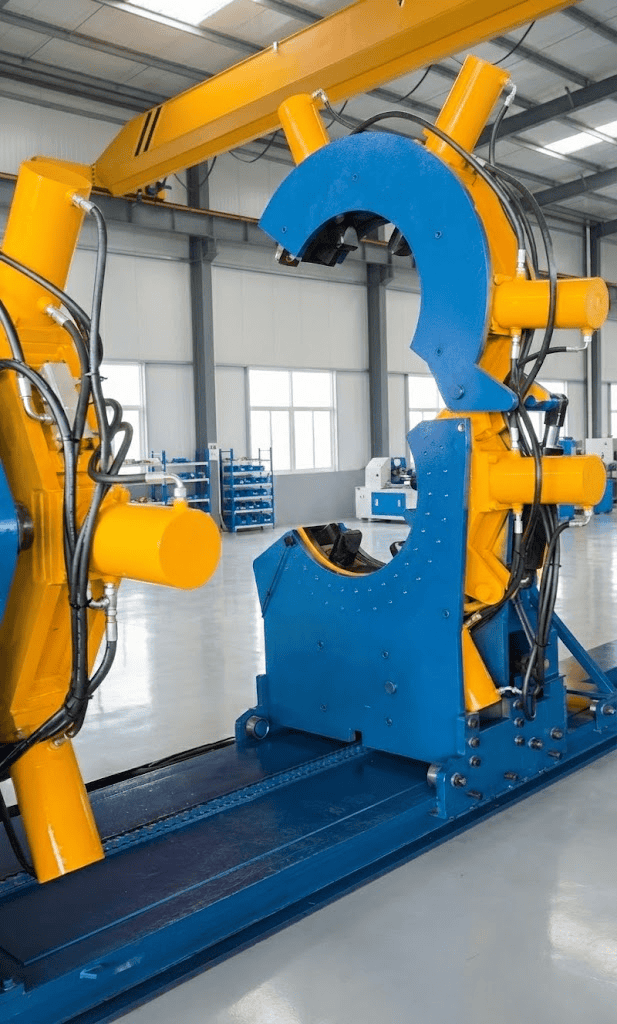
Bucking Unit Integrated Systems & Infrastructure
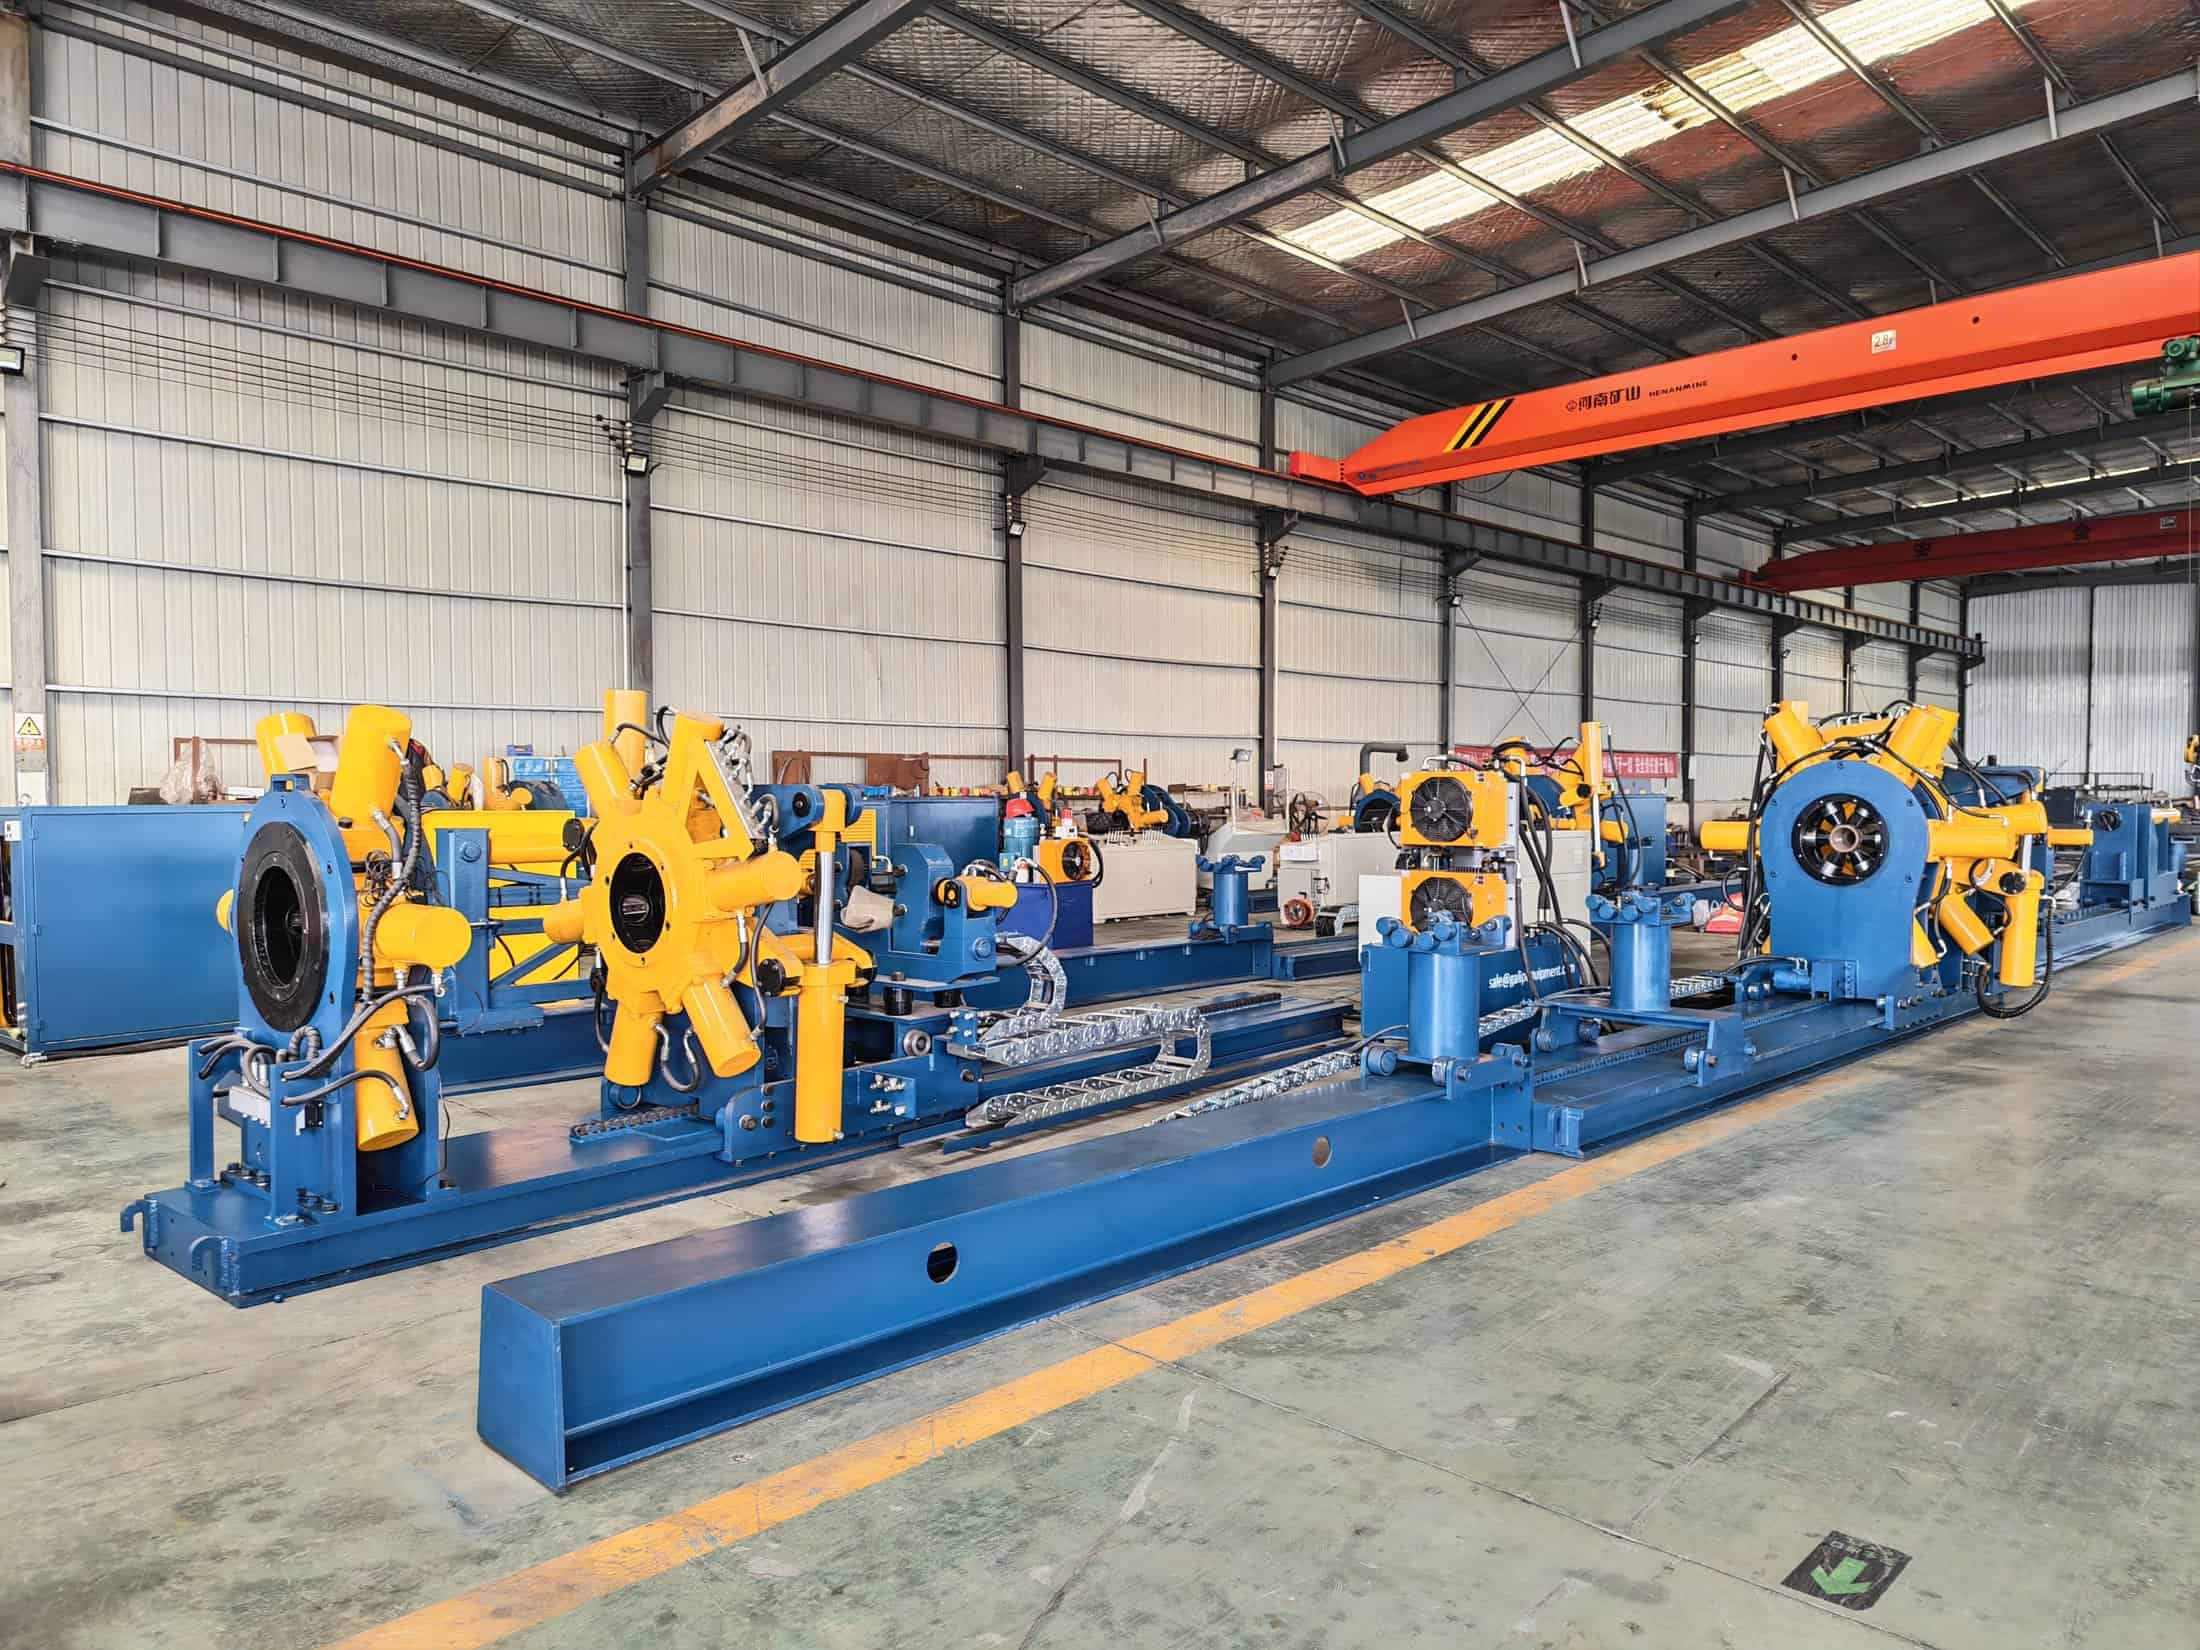
The photos here show the command, control, and power systems on our own machines. Every shot is from Galip’s factory in Pingyuan County, Shandong — these are real builds, not stock images. We fabricate, machine, assemble, and load-test each unit in-house under our ISO 9001:2015 system, and you can schedule an inspection against the build plan before it ships, including a customer or third-party witness.
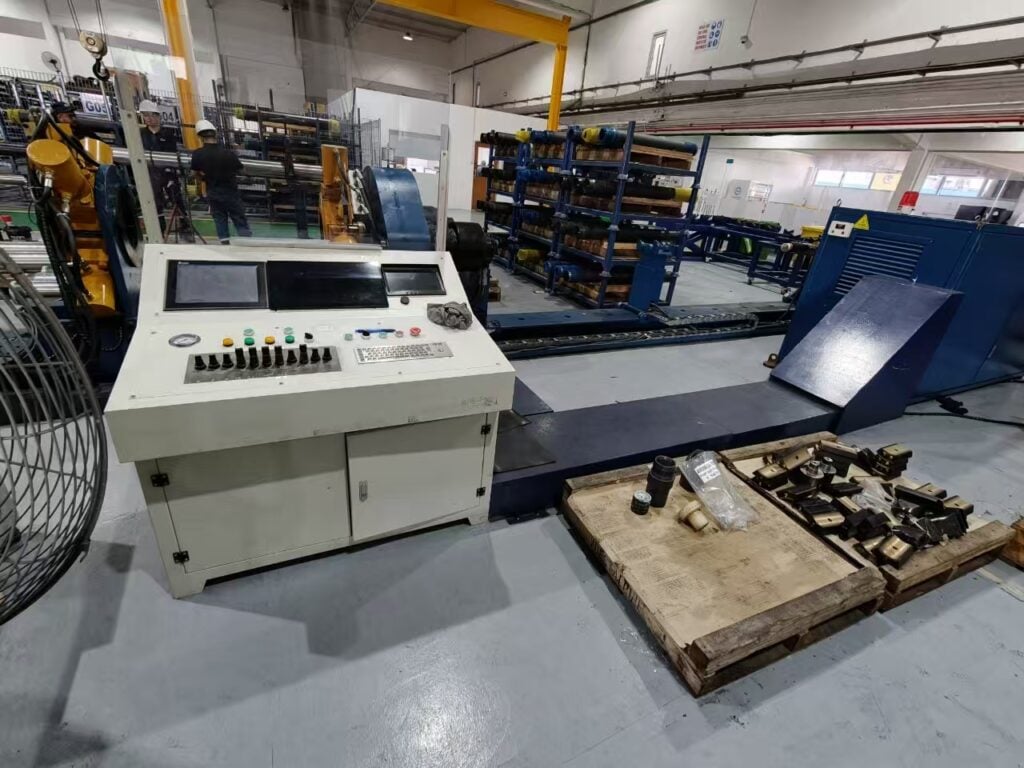
Bucking Unit Command Console & Reporting
A 19" touchscreen shows the torque-turn curve in real time, with a separate 10" display for the controls. The system logs the full run and builds the make-up report on its own — a PDF for sign-off, or an Excel file when you need the raw numbers.
Each report ties the torque signature to the pipe serial number for QA retention and mill audits, in line with API 5CT practice. Final acceptance still follows the customer’s own procedure.
Bucking Unit Power & PLC Infrastructure
The system is driven by an up to 500 L closed-tank hydraulic power unit pushing 250 L/min. It maintains low noise output while delivering extreme proportional force.
Electro-hydraulic proportional control for precise, continuous automated make-up.
Vibration-resistant electrical cabinets housing cleanly routed, standardized industrial PLC switchgear.
Fully Rotational, High-Torque Bucking Unit - Specifications
As a Chinese manufacturer, our real advantage is price: a Galip fully rotational bucking unit usually costs far less than a Western-built machine of the same class, for the same controlled make-up. It runs as both a make-up and break-out torque machine, and the torque, pipe and connection range, jaws, voltage, and control package are all built to your job; higher-torque models and one-off arrangements are available on request. Every figure in the tables below is measured at the factory acceptance test before the machine ships, and that test run’s report travels with it, so you can check any published number yourself.
| Machine Frame Size | Min OD | Max OD | Min Torque | Max Torque | Unit | Typical Applications |
|---|---|---|---|---|---|---|
| 10" | 1‑5/8" | 10" | 500 | 100,000 | ft‑lb | Tubing, drill pipe, pup joints, service tools |
| 15" | 2‑3/8" | 15" | 1,000 | 150,000 | ft‑lb | Casing, drill pipe, completion tools, crossovers |
| 18" | 2‑3/8" | 18" | 1,000 | 170,000 | ft‑lb | Casing, drill pipe, BHA, completion tools |
| 20" | 2‑3/8" | 20" | 1,000 | 199,000 | ft‑lb | Large casing, BHA, heavy completion tools |
| 22" | 2‑3/8" | 22" | 1,000 | 199,000 | ft‑lb | Large-diameter casing, risers, heavy tools |
| 24" | 2‑3/8" | 24" | 1,000 | 199,000 | ft‑lb | Largest casing / conductor, heavy BHA |
| Up to 32" | 2‑3/8" | Up to 32" | 1,000 | On request | ft‑lb | Conductor / structural casing (made to order) |
Galip fully-rotational bucking units are available in 10", 15", 18", 20", 22" and 24" frames, with custom builds up to 32". Pipe outer diameters start at 1‑5/8" and make-up / break-out torque spans 500 to 199,000 ft‑lb, with higher-torque packages available on request. Every model provides 360° continuous rotation with torque/turn recording and automatic report generation. Torque range, jaw configuration, voltage, and control package are tailored to your application.
Detailed Technical Specifications
Select a category to view detailed specifications. Items noted as customizable can be tailored to your application.
| Rotation | Fully rotational, 360° |
|---|---|
| RPM range | 0.5 – 6 rpm |
| Torque accuracy | ±150 ft‑lb |
| Turns resolution (encoder) | 0.0001 turn |
| Shoulder detection | Automatic shoulder-point detection on the torque-turn curve (shoulder & delta torque evaluation) |
| Clamping system | 6 cylinders; synchronization ±0.3% |
| Clamping force | 240 kN per cylinder @ 20 MPa |
| Headstock travel | 9.8 ft, speed adjustable · customizable |
|---|---|
| Torque options | Higher-torque package available · customizable |
| Support beams | Extension beams 19 ft / 5,800 mm each · customizable |
| Roller jacks | 8,800 lbs / 40 kN |
| Cylinder rail | 22 ft; rated 22,000 lbs · customizable |
| Anti-collision | Integrated protection |
| Flow rate | 250 L/min |
|---|---|
| Pressure | Working 2,900 psi; max 4,350 psi |
| Oil tank | Up to 500 L closed tank · customizable |
| Noise | < 70 dB(A) |
| Control | Electro-hydraulic proportional; automatic make-up |
|---|---|
| Console | 19" touchscreen (real-time torque/turn curve) + 10" control display |
| Reporting | Auto PDF report + Excel export (all data points recorded) |
| Safety | Emergency stop + protective guarding |
Get a Bucking Unit Configuration & Quote
Send your OD range, torque range, connection family, reporting needs, and workshop details. Galip’s engineering team will reply with a configuration and quote matched to your real workshop conditions — not a generic catalog price.
Galip Bucking Units in the Real World
Production-floor and field photos of Galip hydraulic bucking units — assembled, commissioned, and in real make-up operation.


Customer projects
Bucking Unit Project Cases
Explore two Galip bucking unit projects configured for different pipe ranges and workshop applications.
 Singapore · 2025 project10-Inch Bucking UnitA fully rotational bucking unit configured for controlled OCTG make-up and container transport.1½–10 in130,000 ft-lb360° rotationView project case
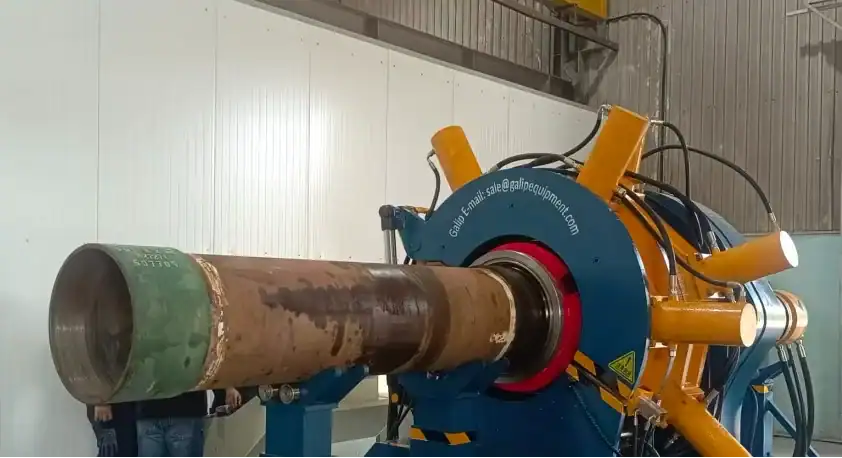 Oman · 2025 project32-Inch Bucking UnitA large-capacity fully rotational bucking unit configured for demanding tubular work up to 32 inches.2⅜–32 in180,000 ft-lbFully rotationalView project case
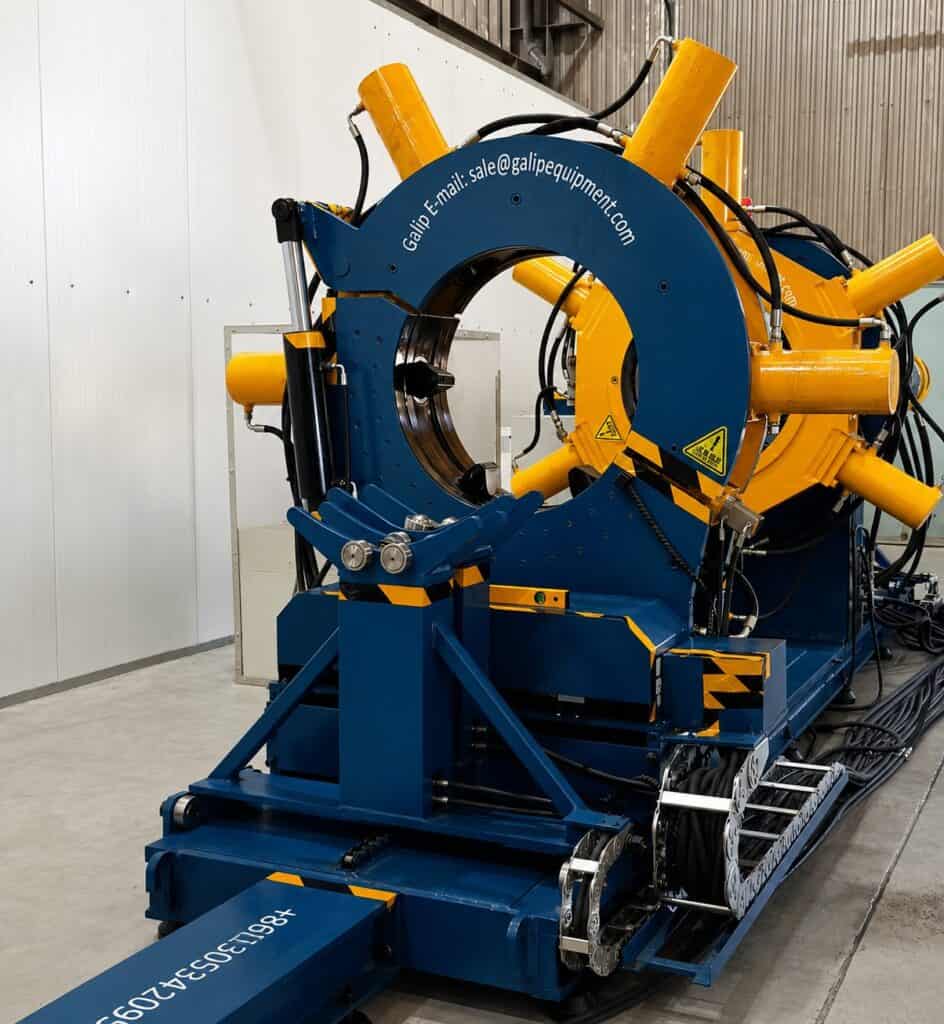
Frame & Configuration
- Welded steel frame on a vibration-resistant base
- 360° fully rotational head for continuous make-up without re-clamping
- OD range 1⅝″ – 24″ (model-dependent), can be customized
- Modular jaw and insert system for OCTG, drill pipe, and BHA connections
Hydraulic Clamping System
- Hydraulic head + tail clamps with independent pressure control
- Electro-hydraulic proportional valves for precise force regulation
- Soft-contact jaws for premium connections, CRA, and chrome tubulars
- Real-time torque-turn capture tied to clamp pressure
How to Choose Your Bucking Unit Configuration
Send the answers below and Galip's engineering team will return a configuration that matches your real workshop conditions — not a generic catalog quote.
Lead Magnet
Request a sample torque-turn report before ordering. Useful for QA leads and technical buyers who want to see the data format and traceability fields before approving the spec.
Buyer Questions
Bucking Unit Buyer Q&A
Galip's bucking units are engineered around the same connection-quality requirements used by leading premium-connection make-up shops worldwide: stable torque delivery, controlled rotation, clamp repeatability, torque-turn capture, and traceable QA reporting. The questions below cover what serious buyers actually ask before approving a configuration.
Is this bucking unit suitable for premium connections?
Yes. Galip's bucking units are configured for premium connection make-up workflows that require controlled rotation, stable clamping, torque-turn monitoring, and traceable reporting. Final acceptance criteria should always follow the connection owner's procedure and the buyer's QA requirements. For the deeper engineering view, see the premium-connection bucking control guide, the in-depth guide to premium thread bucking units, and VAM and Tenaris make-up considerations for the largest brands.
Is final torque enough to judge connection quality?
No. Final torque is only one part of acceptance. For premium connections, torque-turn curve behavior, shoulder approach, clamp stability, alignment, and procedure compliance are equally important. The curve shape often reveals issues the final number alone hides — see how to read a torque-turn graph for the patterns that should trigger a hold point, the connection quality scorecard for how to predict failures before they happen, and the pipe connection integrity guide for the wider control set around thread prep, torque-turn control, and leak prevention.
What data does the torque-turn system record?
Torque, turn count, full curve behavior, operator/job identification, target vs. final values, and any exception event. Reports export in PDF and Excel format for QA, witness review, and audit retention. For the operator-level workflow, see the bucking unit operation procedure; for how torque-turn monitoring fits into the wider tubular make-up program, the torque-turn monitoring systems guide; and for the QA paper trail itself, connection traceability in oilfield operations.
Can the bucking unit be customized for our OD and torque range?
Yes. Configuration is built around the actual pipe/tool OD, connection family, torque requirement, clamp layout, support stands, tooling, and reporting format. For the complete list of spec fields that normally appear in a proposal, this guide to bucking unit specifications covers what to send and what to expect back. If you're choosing between machine architectures, the rotational vs traditional bucking unit decision matrix explains where each approach earns its keep, and the large threaded assemblies guide covers the heavier OD end of the range.
What information should I send before requesting a quote?
Send product type, OD range, torque range, thread family, daily output target, reporting requirement, power supply, workshop space, and destination country. The bucking unit operation procedure includes a full RFQ checklist that maps cleanly into a configuration review, the bucking unit specifications guide lists the fields normally collected, and bucking unit 101 for new teams gives workflow context for what the spec will be evaluated against.
Can the machine handle CRA, chrome, or damage-sensitive pipe?
Yes — the clamping and jaw system can be configured for damage-sensitive applications, but jaw type, clamp force, and handling procedure must be matched to the pipe material and surface condition. Thread-compound discipline matters as much as the machine itself — see why thread-compound discipline still matters during premium make-up, CRA connection handling operator habits for the workshop-side rules, and the thread-protector discipline guide for the protection routine that keeps surfaces clean before clamping.
How does the bucking unit reduce rejection risk?
By standardizing clamp force, rotation speed, torque delivery, torque-turn capture, and report generation. That removes operator variation and gives QA teams hard evidence for acceptance review. For the cost-and-quality view, see why torque-controlled make-up changes connection quality, how torque control improves safety and thread integrity, and the premium thread connection failures inspection checklist for the failure modes the controls actually prevent.
Do you provide training and spare parts?
Yes. Support includes commissioning assistance, operator orientation, and a spares package matched to the wear items your team will actually replace on a normal service cycle. Operator workflow — pre-checks, clamping, recording, and exception handling — is covered in the bucking unit operation procedure, the pre-shift operator checklist for the first joint, and bucking unit 101 for new teams for orientation material that brings new operators up to speed quickly.
Can you provide a sample torque-turn report?
Yes. Customers can request a sample report to review data format, curve display, exception logging, and traceability fields before confirming the final machine configuration. See how to interpret a torque-turn graph for what a clean record should communicate, connection traceability in oilfield operations for how the report fits into broader QA documentation, and the torque-turn monitoring systems guide for the data-acquisition context.
How long is the lead time?
Lead time depends on torque range, OD range, customization, production schedule, inspection requirements, and destination. After the technical configuration is confirmed, Galip provides a realistic production and shipping plan, typically with staged payment and inspection checkpoints aligned to the buyer's procurement process. For context on how a make/break service cell — including bucking and breakout equipment — comes together end-to-end, see completion tool service make/break cell and the comprehensive guide to make-up and breakout torque machines.
How do I confirm a bucking unit is ready for production before final payment?
Practical engineering guides
Torque Machine Knowledge Hub
Start with five practical guides for selecting, specifying and accepting a workshop torque machine.
Request a Quote
Send us your requirements and our team will put together a proper proposal — the right model, full specs, pricing, and a delivery timeline. We manufacture in China, so you deal with the factory directly.

Send your inquiry
Share your product type, operating conditions, quantity, and timing so our team can prepare a practical quote or next-step recommendation.